Introduction:
There are some recipes that just hug you back. This Chana Masala Recipe is one of them. It’s the kind of meal that feels like home, no matter where you are warm, fragrant, and deeply satisfying in a way only slow cooked spices can be.
I’ve made this dish more times than I can count, and every single batch tells its own little story sometimes the onions browned too much, sometimes the tomatoes took forever to melt down, but somehow it always ended up tasting incredible. That’s the beauty of a good home style Chana Masala. It forgives your mistakes, rewards your patience, and fills your kitchen with the kind of smell that makes people wander in asking, “What are you cooking?”
So today, I’m sharing my most loved, deeply flavorful version of this Chana Masala Recipe, the one I always come back to when I crave something comforting, hearty, and real.
Why This Chana Masala Recipe?
Because it’s simple, yet layered with flavors that make you feel like you’ve done something extraordinary. The base is humble onions, tomatoes, garlic, and a few pantry spices but together, they create something magical.
I’ve tried fancy restaurant-style versions before, but nothing beats the rustic, thick, spicy sour gravy that clings to every chickpea in this version. It’s home cooking perfection.
My Personal Story Behind This Dish:
I still remember the first time I made Chana Masala on my own. It was a rainy Sunday afternoon; the kind where you want something warm and cozy but don’t want to go grocery shopping. I had a can of chickpeas, two tomatoes, and a wrinkly onion lying in the corner. That day, with a bit of curiosity and a lot of garlic, I created my first real Chana Masala and let me tell you, it was love at first bite.
Since then, this dish has become my kitchen staple. Whether it’s a lazy solo dinner or a weekend gathering, Chana Masala always shows up bubbling away in the pan, filling the air with spice, tang, and nostalgia.
Ingredients (Serves 4 to 6):
- 1 cup dried chickpeas (or 2 cups cooked or canned chickpeas)
- Water, as needed for soaking and cooking
- 1 large onion, finely chopped
- 3 medium ripe tomatoes, pureed or finely chopped
- 1 tbsp ginger garlic paste
- 1 to 2 green chilies, chopped
- 3 to 4 tbsp oil or ghee (I usually mix both it adds depth)
- 1 tsp cumin seeds
- ½ tsp turmeric powder
- 1 tsp red chili powder (adjust to taste)
- 1½ tsp coriander powder
- ½ tsp garam masala
- 1 tsp chaat masala (optional but amazing)
- Salt, to taste
- 1 tbsp lemon juice
- ½ tsp amchur powder (dry mango powder) or tamarind pulp for tang
- Fresh coriander leaves for garnish
Step by Step My Honest, Kitchen Tested Chana Masala Recipe:
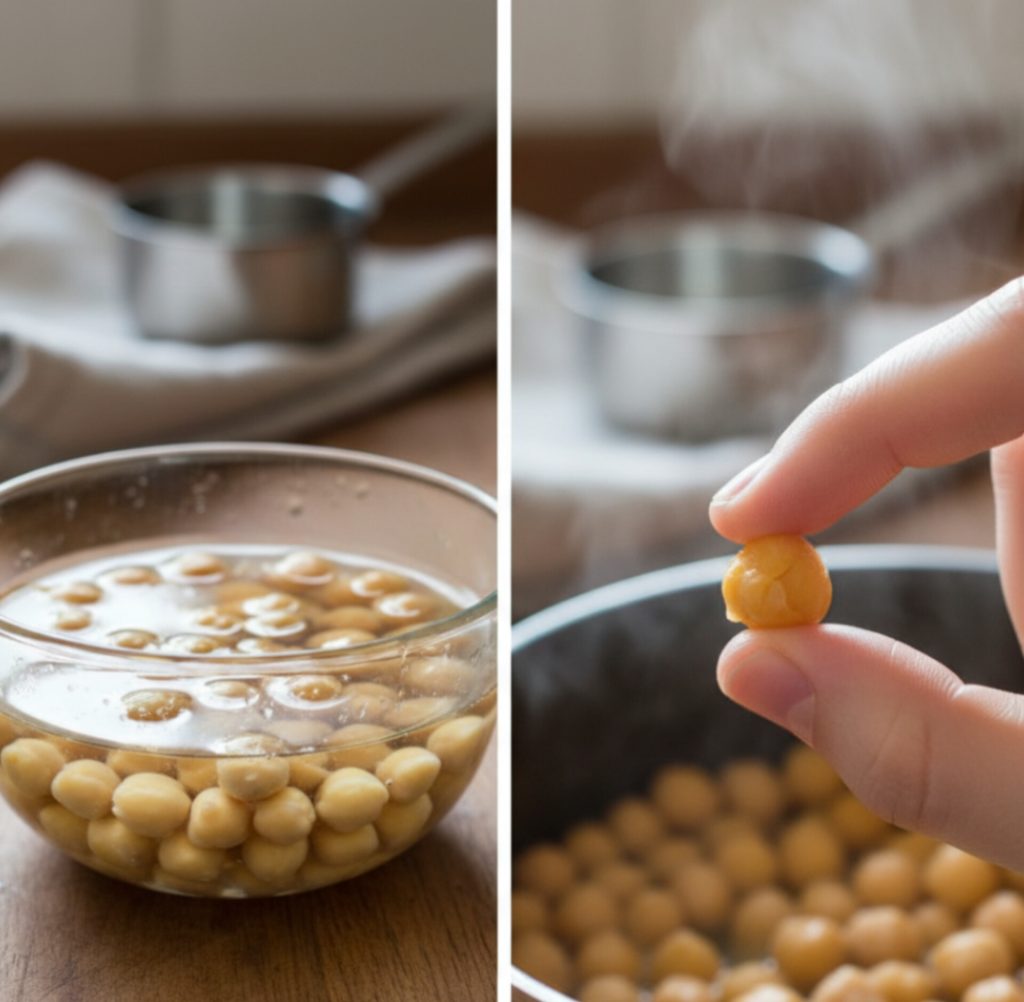
Step 1: Soak and Cook the Chickpeas
If you’re using dried chickpeas, soak them overnight in plenty of water. They’ll almost double in size by morning. Drain and rinse them, then cook them in fresh water with a pinch of salt.
If you’re using a pressure cooker, it’ll take about 6 to 7 whistles (roughly 25 to 30 minutes) until they’re tender but not mushy. If you cook them in a regular pot, be patient it can take up to 90 minutes.
A quick check: when you press a chickpea between your fingers, it should flatten easily but not fall apart. That’s your sweet spot.
If using canned chickpeas (hey, no judgment!), rinse them thoroughly under running water to remove that canned taste, then simmer them in hot water for 5 to 10 minutes to freshen them up.
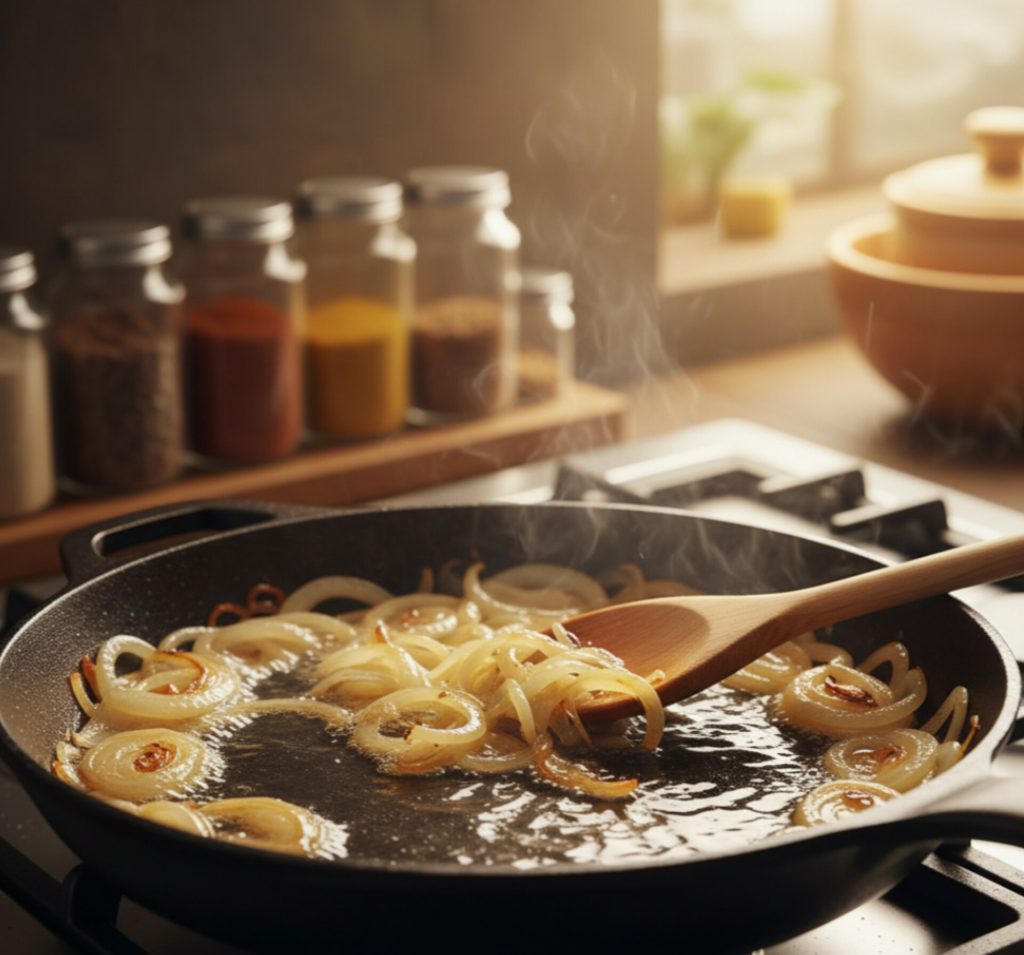
Step 2: Start the Base The Golden Onion
Heat oil (or ghee, or both) in a heavy bottomed pan. Once it’s hot, add cumin seeds wait for them to sizzle and dance a little. Then add your chopped onions.
Now here’s the important part don’t rush the onions. Keep stirring on medium heat until they turn a rich, deep golden brown. This takes time, about 10 to 12 minutes, but this is where the flavor begins.
The smell will change from sharp and raw to sweet and nutty. That’s your cue. If you burn them, the entire curry will taste bitter, so keep an eye on them.
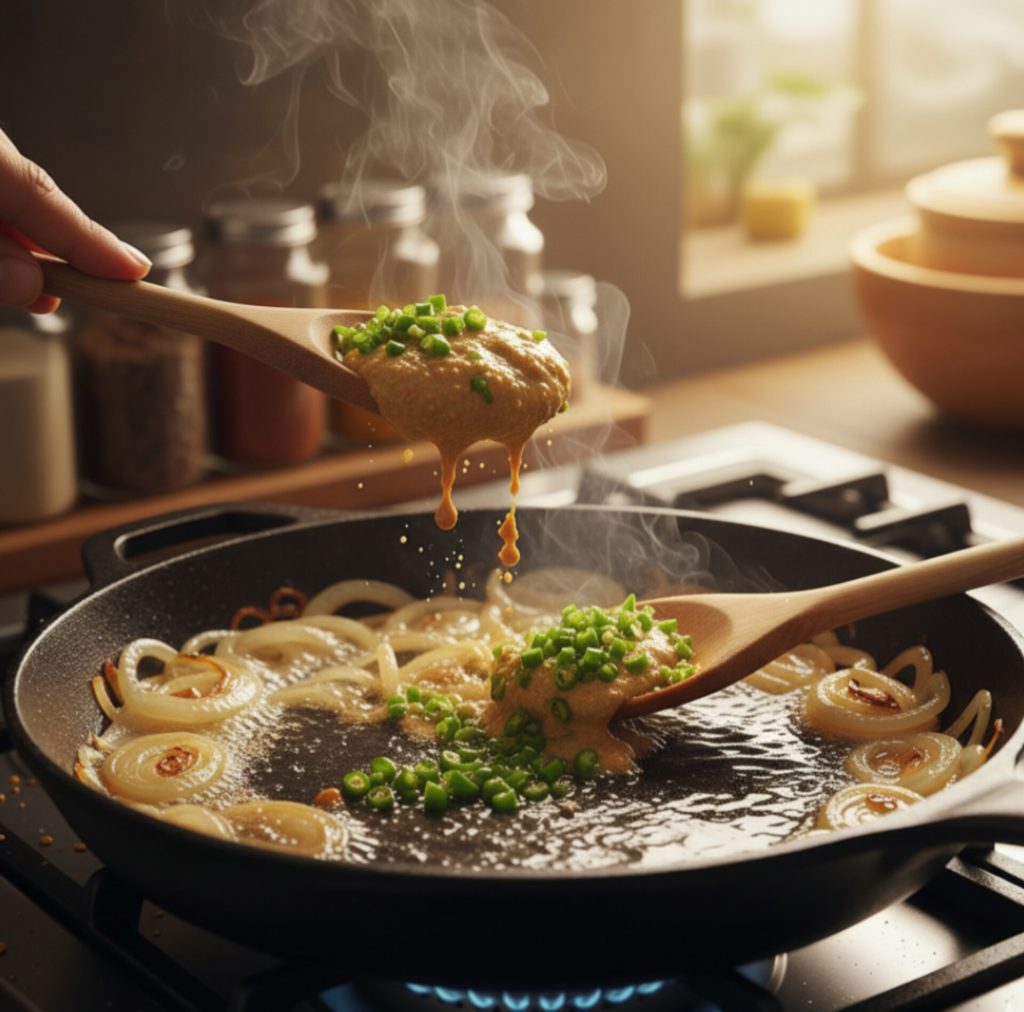
Step 3: Add the Ginger Garlic Paste
The moment your onions hit that perfect brown, add the ginger garlic paste and chopped green chilies. Stir quickly because this stage can burn fast.
You’ll know it’s ready when that raw, sharp smell fades and you’re left with something fragrant and mellow that’s when the masala base is truly coming alive.
Step 4: The Tomatoes Join the Party
Add in the pureed or finely chopped tomatoes. I usually lower the heat a little here and cover the pan for about 5 to 6 minutes. You want the tomatoes to soften completely, releasing their juices, until the oil starts separating from the edges a classic sign of a good masala.
If your tomatoes are too tangy, you can add a pinch of sugar here to balance the flavor. It’s a small trick that makes a big difference.
Step 5: Spice It Up
Now sprinkle in turmeric, red chili powder, coriander powder, and salt. Mix everything well and cook for another 5 to 6 minutes.
The mixture will get thicker and darker that’s the masala base reaching perfection. Don’t be afraid to add a splash of water if it’s sticking to the pan. I often stir and taste here, adjusting salt or chili as needed.
This stage defines your Chana Masala Recipe, so take your time. When it smells irresistible and the oil has started separating again, you know it’s ready for the next step.

Step 6: Bring in the Chickpeas
Pour in about 1½ cups of the chickpea cooking water (or plain hot water if you used canned). Bring it to a simmer, then reduce the heat and let it cook uncovered for 15 to 20 minutes.
This is where magic happens the chickpeas absorb all those deep, roasted flavors. Occasionally mash a few with the back of your spoon to thicken the gravy naturally.

Step 7: The Finishing Touch
Once the gravy reaches your desired thickness (I like it medium not too runny, not too dry), stir in garam masala, amchur powder, and chaat masala if using.
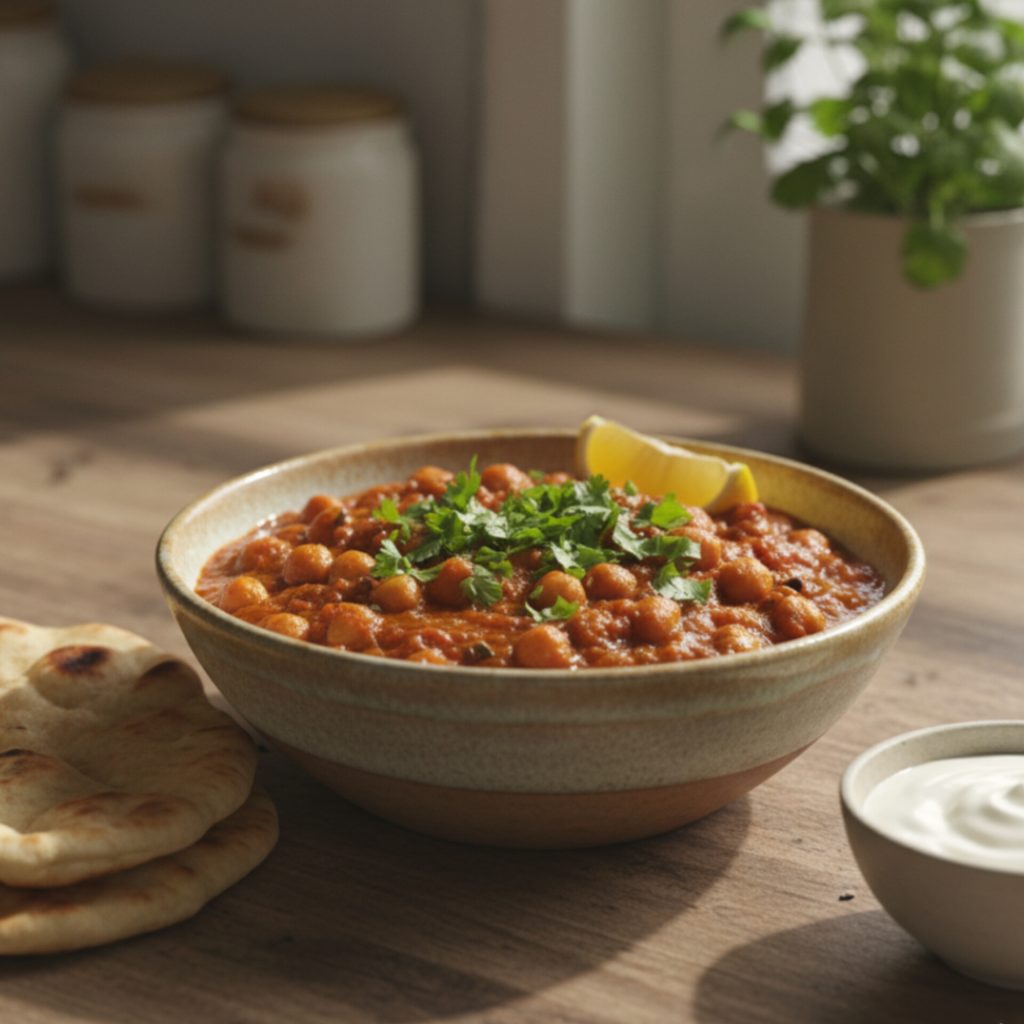
Taste it. You’ll know instantly when it hits that perfect spot spicy, tangy, earthy. Turn off the heat, squeeze in fresh lemon juice, and garnish with chopped coriander.
Let it rest for 10 minutes before serving this short wait helps the flavors marry beautifully.
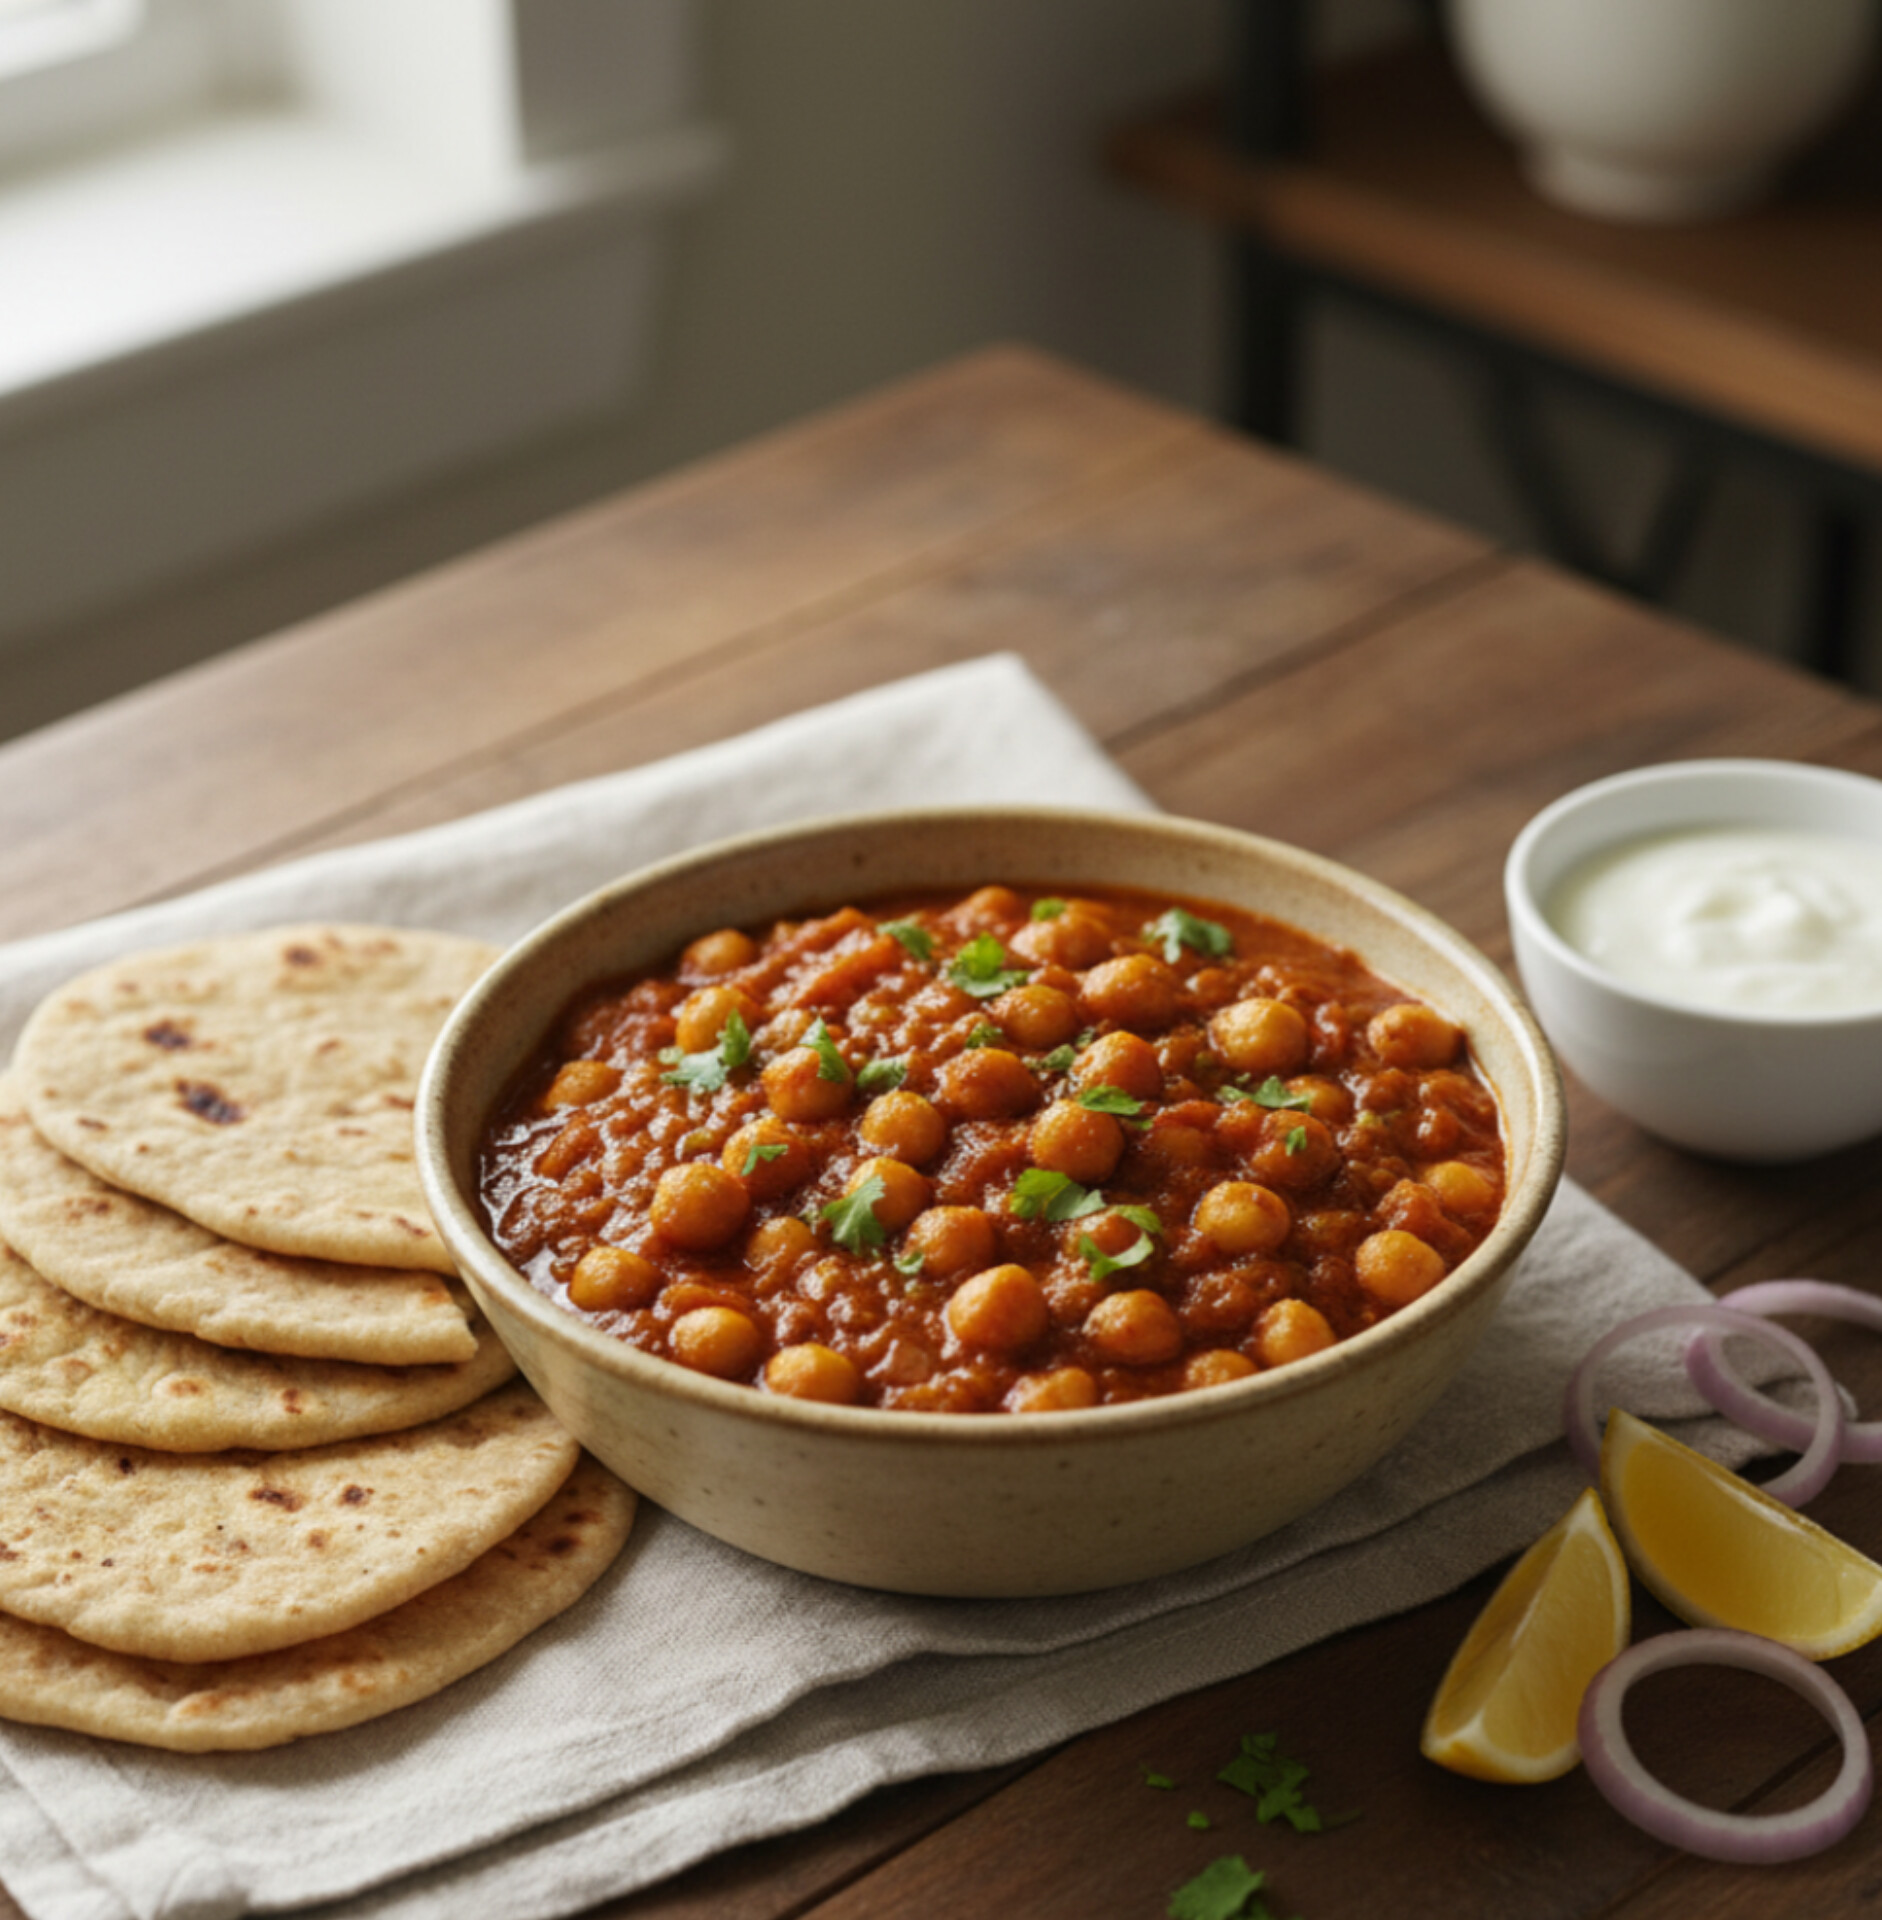
How to Serve It:
I love serving Chana Masala with basmati rice or soft chapatis. Sometimes I even scoop it up with a crispy paratha when I want something extra indulgent. A little sliced onion and a wedge of lemon on the side, and you’ve got a complete, comforting meal.
If you want to make it more special, serve it with jeera rice and a spoonful of plain yogurt. The contrast of creamy and spicy is just unbeatable.
Common Mistakes and My Fixes:
- Onions too dark? It’s okay! Just add a little extra tomato and cook it down it’ll mellow out.
- Too spicy? Stir in a spoon of yogurt or cream at the end.
- Too bland? Add a pinch of salt and squeeze of lemon acidity always wakes up the flavors.
- Too watery? Let it simmer longer uncovered; it thickens naturally.
Cooking is not about perfection it’s about rhythm, smell, and instinct. And trust me, once you make this Chana Masala Recipe a few times, you’ll just know when it’s right.
Storage Tips:
Chana Masala tastes even better the next day because the spices deepen overnight. Store leftovers in an airtight container in the fridge for up to 3 days. Reheat gently with a splash of water to loosen the gravy.
It also freezes beautifully just avoid adding the lemon juice before freezing; add it fresh when reheating.
A Final Thought:
Every kitchen has its comfort dish, and for me, this Chana Masala Recipe is exactly that. It’s warm, familiar, and endlessly comforting. Whether you’re making it for guests or just for yourself on a quiet evening, it brings that unmistakable “home” feeling to your table.
Cooking this isn’t just about following steps it’s about slowing down, tasting as you go, and letting those aromas tell you what’s happening. That’s the true joy of making a meal like this one.